


EL 21 Switch V4 P60-80
Applicable for:
- AVA Master: P60, P70, P80, both Master 1.0 & Master 2.0
- Evolution: P60, P70, P80
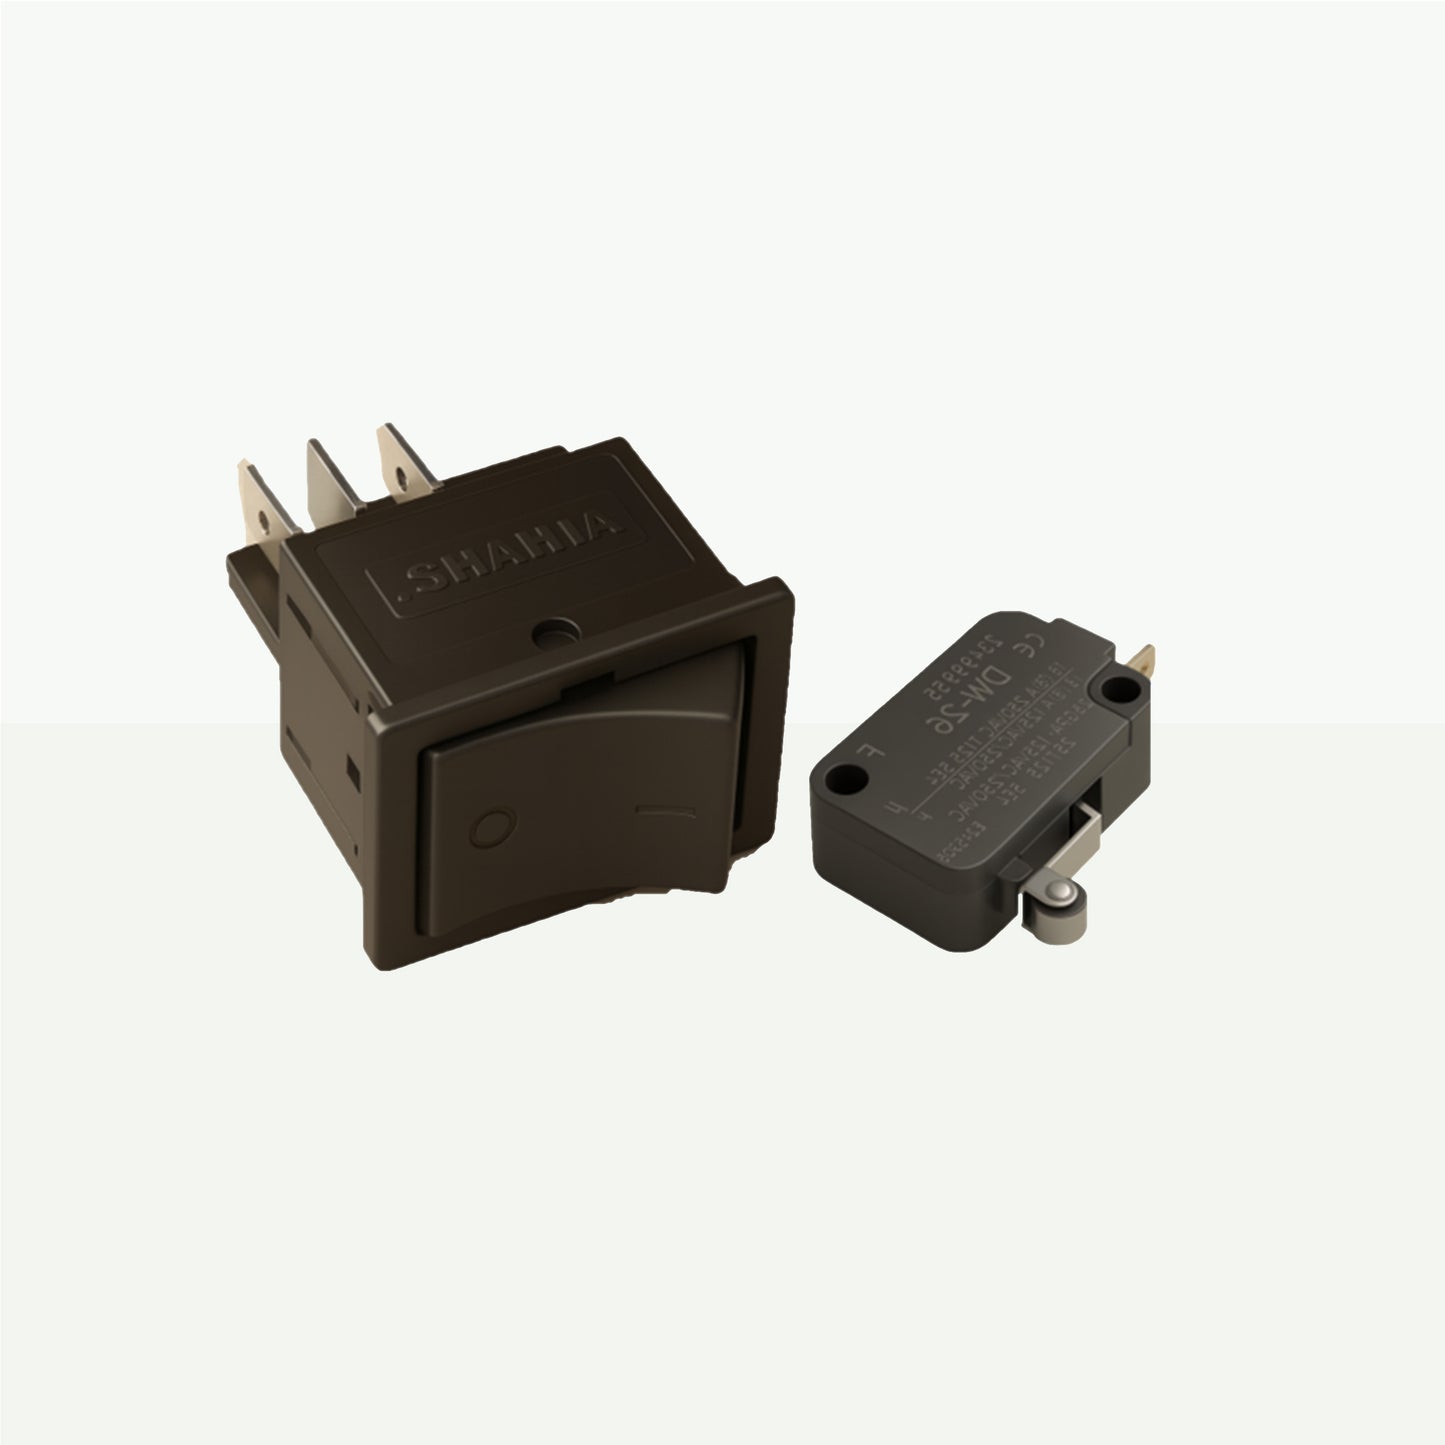
This is the main electrical switch responsible for turning the machine on and off. It is mounted inside the switch box and activated by the external rotary knob.
The switch is a standardized component used in various pressure washer models.
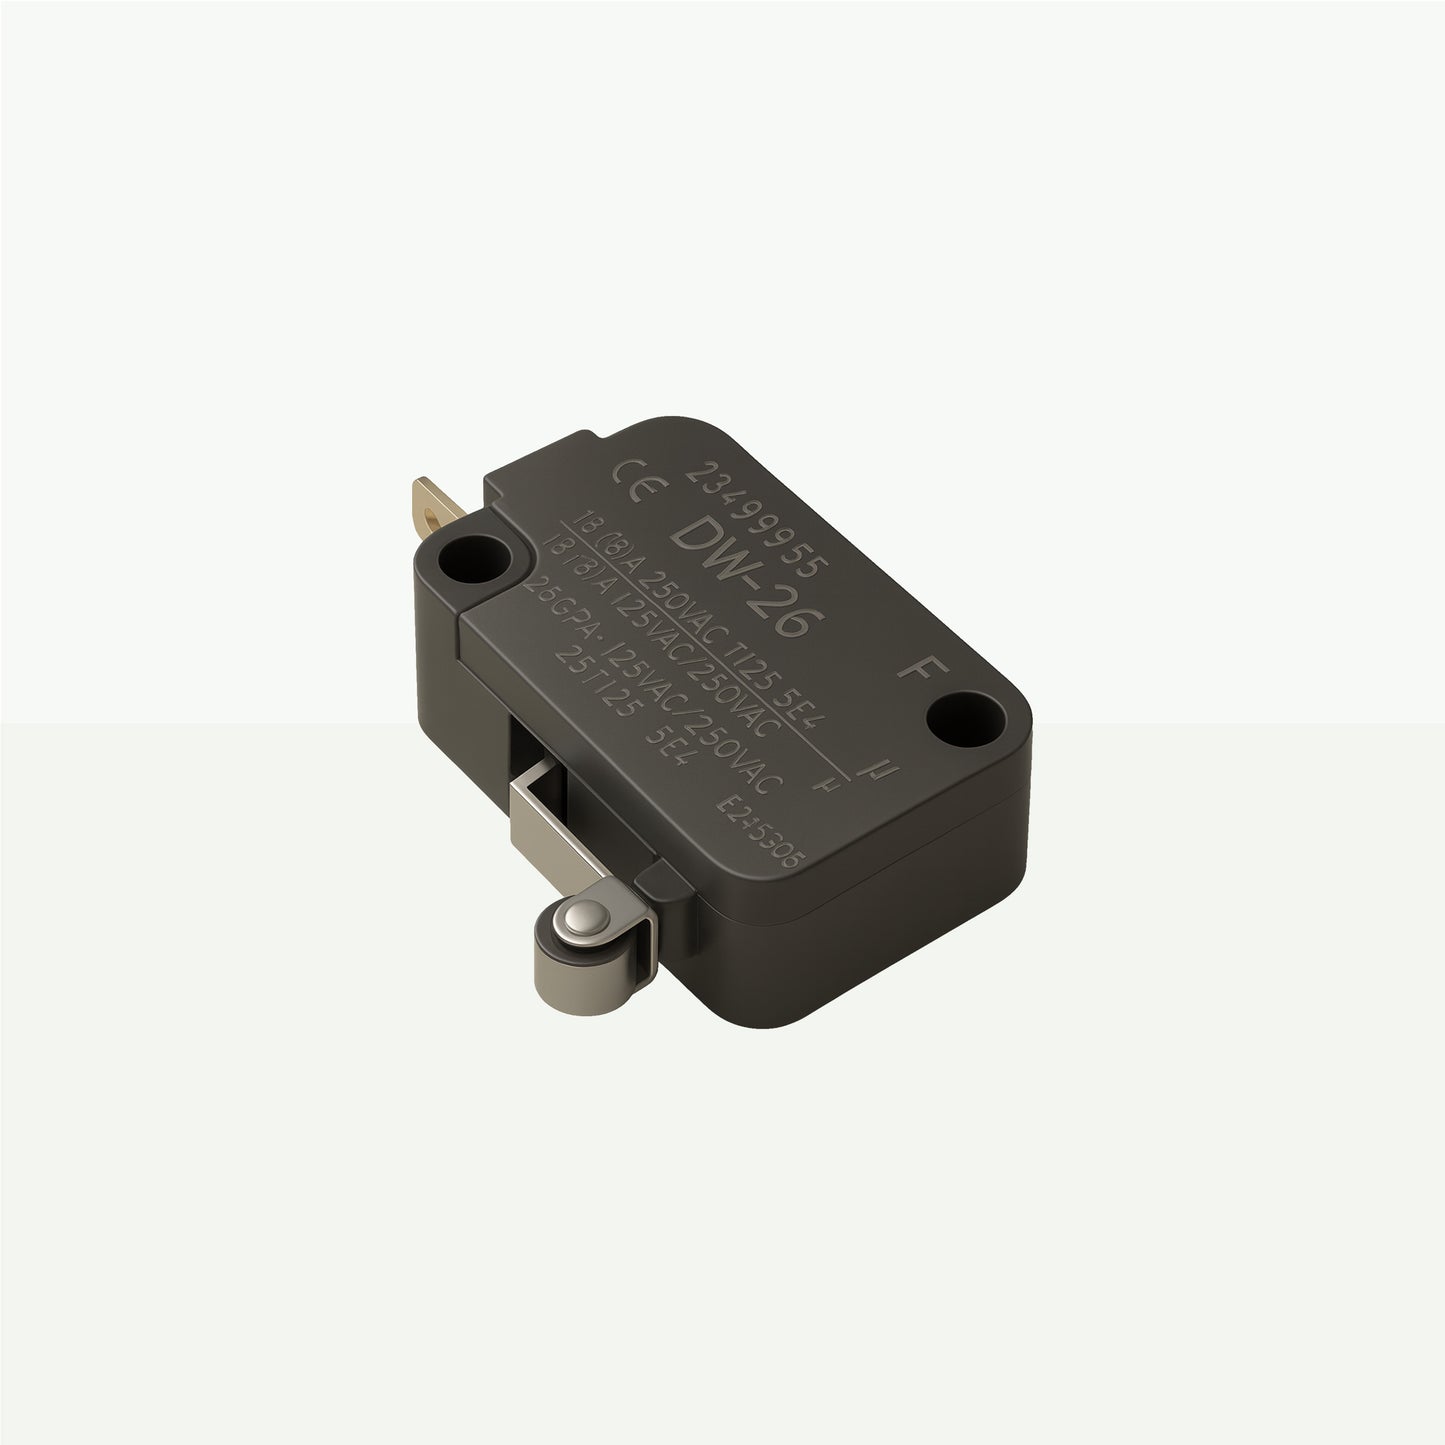
The micro switch which is directly connected is also included. We recommend to always change both if one has a failure.
*Recommended for highly skilled technicians only
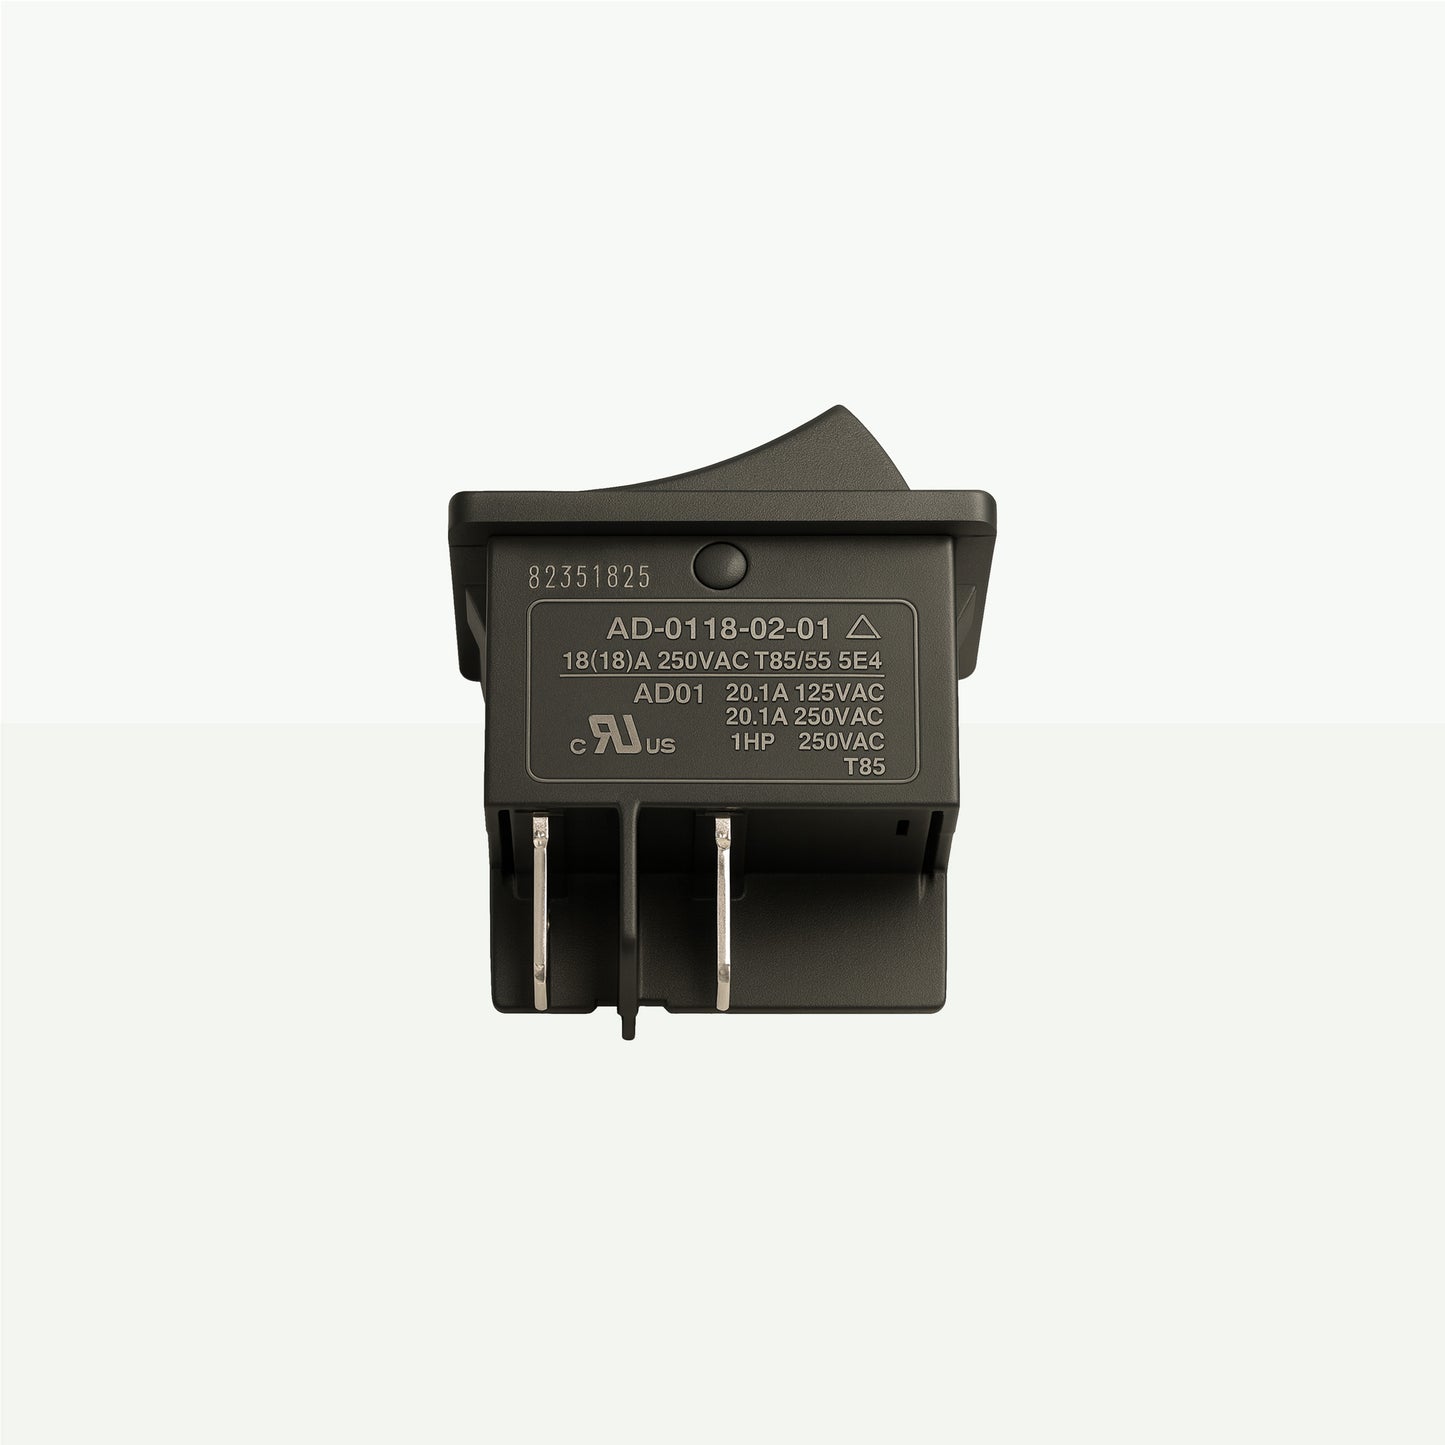
Note: This part is widely available from multiple manufacturers. If you consider a third-party replacement, always compare voltage, current, mounting format, and pin configuration with the technical data shown in the product image. Even minor differences can cause malfunction or pose safety risks.
*Although this switch can be replaced on its own, we strongly recommend replacing the entire switch box assembly. The root cause of failure is often not the switch itself, but damage or wear in the plastic mounting tracks where the switch is installed. If these tracks are cracked, bent, or misaligned, a new switch may not sit correctly – and the problem will return.
Looking for the complete solution? We recommend using a full complete switchbox that includes a new switch box and ensures proper function and safe installation.
Typical cause of failure
• Wear or arcing from repeated on/off cycles, typically leakage
• Poor electrical contact due to misalignment in the housing
• Moisture intrusion, corrosion, or overheating
• Incorrect installation causing physical stress on the switch terminals
Failure symptoms
Part correlation
• Machine does not respond when turned on.
• Intermittent start/stop during use.
• Click is heard when turning knob, but nothing happens.
• Signs of burning or corrosion inside the switch box.
Installation advice
Always priority safety first: Safety instructions – AVA of Norway
- Make sure you have considered the alternative regarding complete switch box above.*
- Disconnect power completely before opening the switch box.
- Click here for Master guide Replace switch axle at step 15, then install knob as described at step 25.
- Click here for Evolution guide Replace switch axle at step 11, then install knob as described at step 20.
- Carefully remove the old switch and inspect both the terminals and the plastic mounting tracks.
- Ensure the new switch is inserted with correct pin alignment and secured without excess force.
- Inspect and change cables if needed.
- If housing damage is present, switch replacement alone is not recommended. Complete switchbox (2025 model) will upgrade machines older than 2025.
Tools Needed for all AVA Pressure Washer Maintenance – AVA of Norway
Warranty and Self-Repair – The AVA Way
At AVA, we encourage repair – not throwaway culture. You’re free to open your machine, inspect it, and replace parts yourself without losing your warranty. That’s part of what makes owning an AVA product different.
We offer guides, spare parts and support so that you can keep your machine running for many years to come – whether it’s a simple nozzle, a carbon brush, or a full pump module.
Many parts are designed to be replaceable – just like they should be.
Visible signs of use or repair are welcomed – they mean the product is being cared for.
Learn more about our warranty: AVA Warranty Terms & Conditions
Price includes VAT
EL 21 Switch V4 P60-80
Applicable for:
- AVA Master: P60, P70, P80, both Master 1.0 & Master 2.0
- Evolution: P60, P70, P80
This is the main electrical switch responsible for turning the machine on and off. It is mounted inside the switch box and activated by the external rotary knob.
The switch is a standardized component used in various pressure washer models.
The micro switch which is directly connected is also included. We recommend to always change both if one has a failure.
*Recommended for highly skilled technicians only
Note: This part is widely available from multiple manufacturers. If you consider a third-party replacement, always compare voltage, current, mounting format, and pin configuration with the technical data shown in the product image. Even minor differences can cause malfunction or pose safety risks.
*Although this switch can be replaced on its own, we strongly recommend replacing the entire switch box assembly. The root cause of failure is often not the switch itself, but damage or wear in the plastic mounting tracks where the switch is installed. If these tracks are cracked, bent, or misaligned, a new switch may not sit correctly – and the problem will return.
Looking for the complete solution? We recommend using a full complete switchbox that includes a new switch box and ensures proper function and safe installation.
Typical cause of failure
• Wear or arcing from repeated on/off cycles, typically leakage
• Poor electrical contact due to misalignment in the housing
• Moisture intrusion, corrosion, or overheating
• Incorrect installation causing physical stress on the switch terminals
Failure symptoms
Part correlation
• Machine does not respond when turned on.
• Intermittent start/stop during use.
• Click is heard when turning knob, but nothing happens.
• Signs of burning or corrosion inside the switch box.
Installation advice
Always priority safety first: Safety instructions – AVA of Norway
- Make sure you have considered the alternative regarding complete switch box above.*
- Disconnect power completely before opening the switch box.
- Click here for Master guide Replace switch axle at step 15, then install knob as described at step 25.
- Click here for Evolution guide Replace switch axle at step 11, then install knob as described at step 20.
- Carefully remove the old switch and inspect both the terminals and the plastic mounting tracks.
- Ensure the new switch is inserted with correct pin alignment and secured without excess force.
- Inspect and change cables if needed.
- If housing damage is present, switch replacement alone is not recommended. Complete switchbox (2025 model) will upgrade machines older than 2025.
Tools Needed for all AVA Pressure Washer Maintenance – AVA of Norway
Warranty and Self-Repair – The AVA Way
At AVA, we encourage repair – not throwaway culture. You’re free to open your machine, inspect it, and replace parts yourself without losing your warranty. That’s part of what makes owning an AVA product different.
We offer guides, spare parts and support so that you can keep your machine running for many years to come – whether it’s a simple nozzle, a carbon brush, or a full pump module.
Many parts are designed to be replaceable – just like they should be.
Visible signs of use or repair are welcomed – they mean the product is being cared for.
Learn more about our warranty: AVA Warranty Terms & Conditions


