This step-by-step guide shows you how to use AVA Steel-Reinforced hose as an extension hose for all AVA Pressure washers or as a replacement hose on the reel on all models of
- Master
- Evolution
- Smart
- Easy*
*For Easy we recommend EA 07 Fiber hose, read more here.
The guide itself doesn’t involve many steps, but each one is described in detail to make the process as easy as possible for you – and to ensure the best possible result. We recommend reading through all the steps before you begin, so you understand the procedure and have the necessary tools to complete the task.
Always unplug the pressure washer from both the mains power and the water inlet before changing parts.
Click here to read our article regarding safety
Even though power and water is disconnected there may be pressurized water in the hose. Discharge this pressure by pulling the trigger on the gun in a safe direction.
Make sure your work area is clean and appropriate for the work you are about to do. There will usually be a small amount of water inside the pump and hose.
Use as extension hose connected to an existing hose?
- Fits all AVA pressure washers.
Follow step 1 and 2 in this guide.
Use as replacement hose on reel?
- Master, Smart, Easy: 12 m fits on reel
- Evolution: 12 and 20 m fits on reel
Follow from step 3 in this guide.
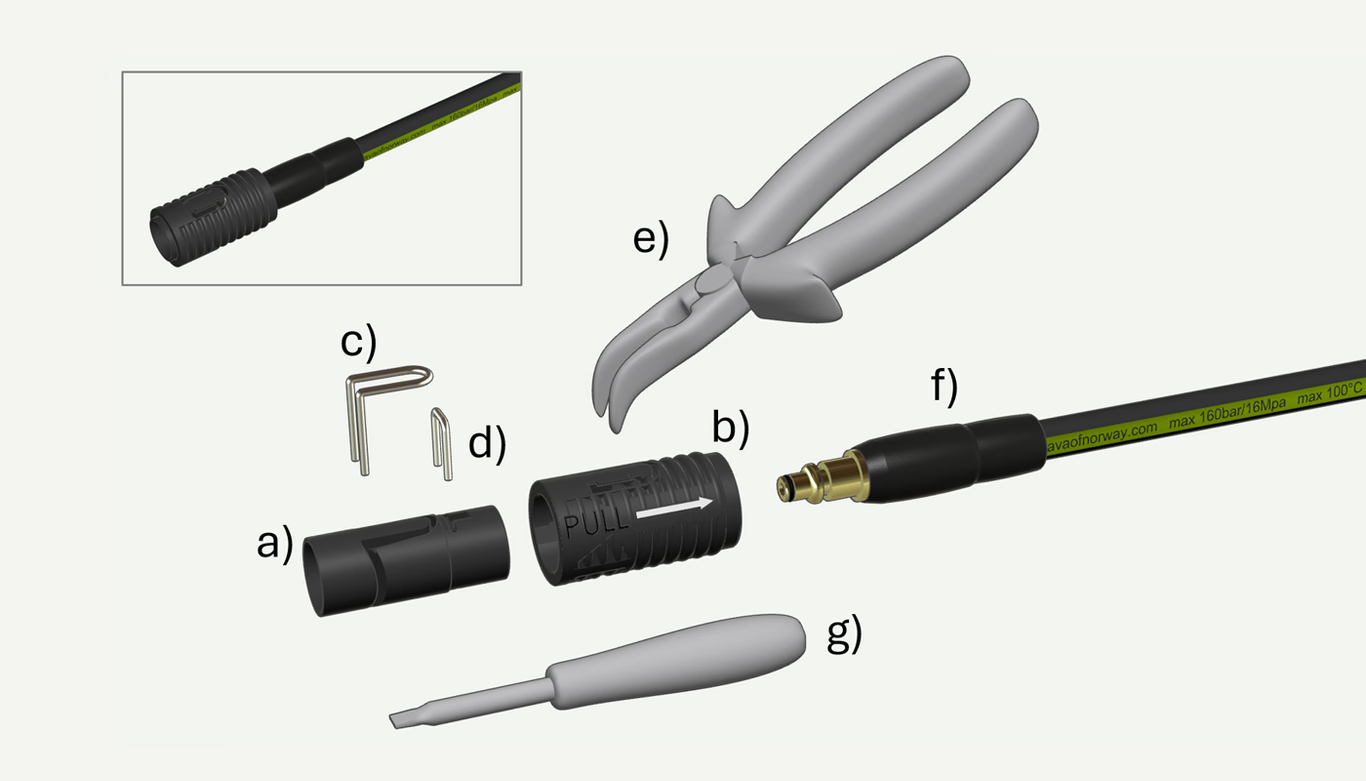
Overview, needed tools/parts
A-D is a kit, attached to the hose.
a) Inner sleeve
b) Outer sleeve
c) Release-Clip
d) U-Clip
e) Pointed cutting pliers or similar tool.
f) Flat screwdriver or similar tool.
g) Extension Hose/new main hose
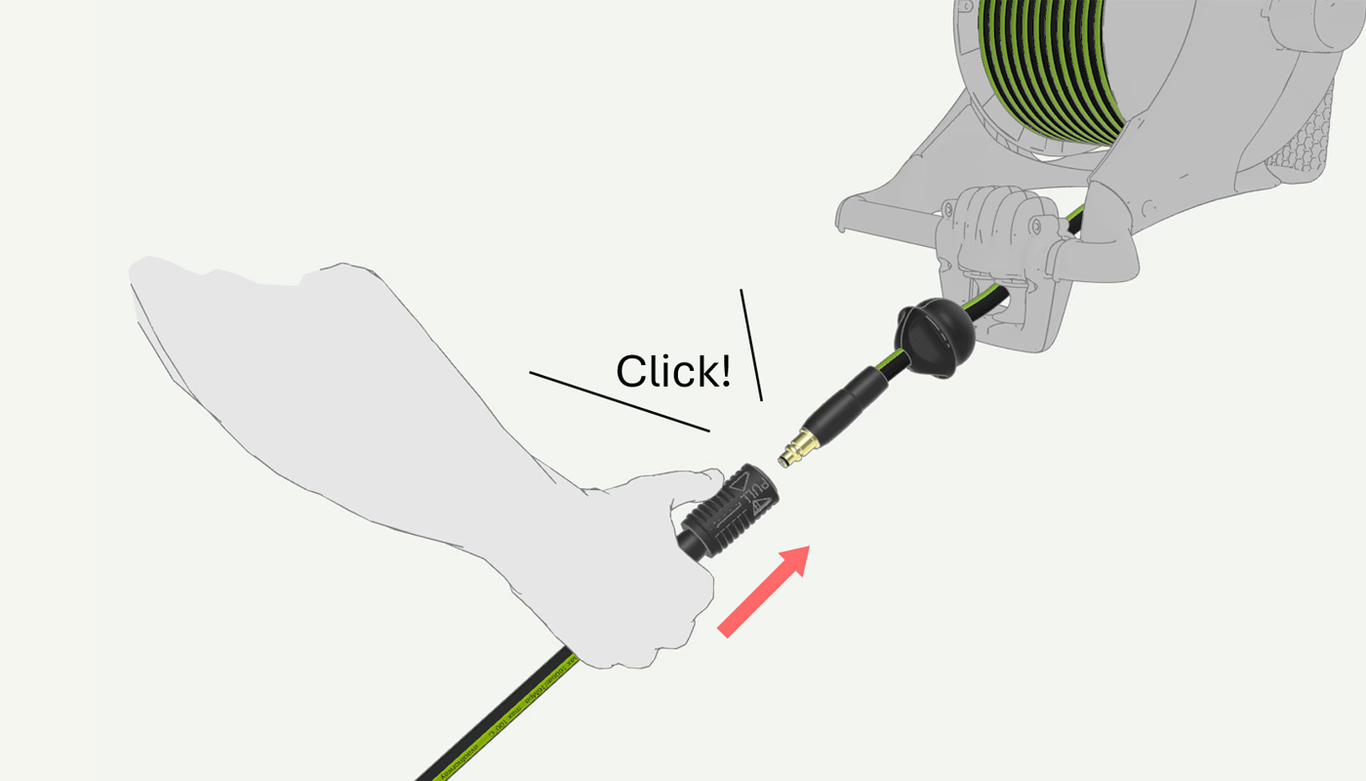
01. How to connect the extension hose to the main hose
Press the female connector on the extension hose together with the quick connector on the main hose.
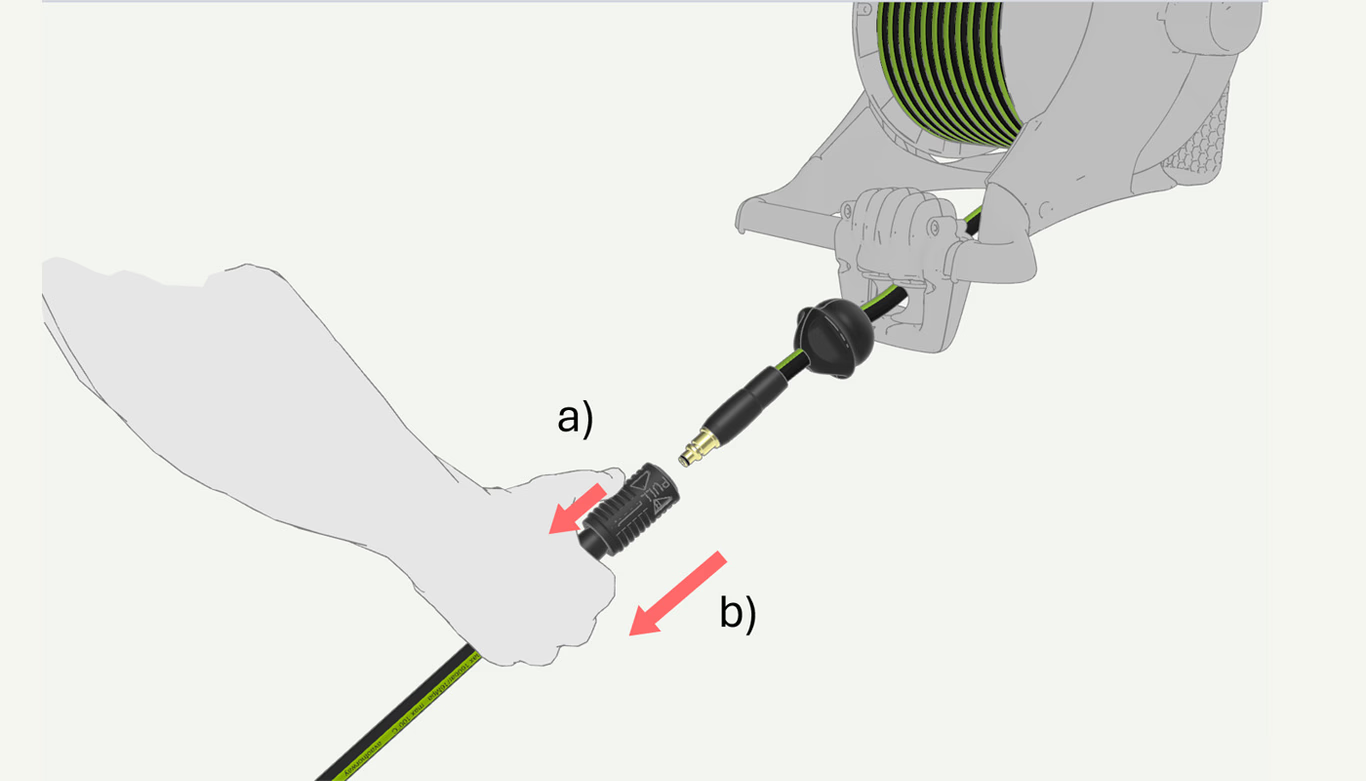
02. How to disconnect the extension hose from the main hose?
a) Pull the outer sleeve on the female coupler backwards.
b) While holding the outer sleeve in back position, Pull the extension hose of the main hose.
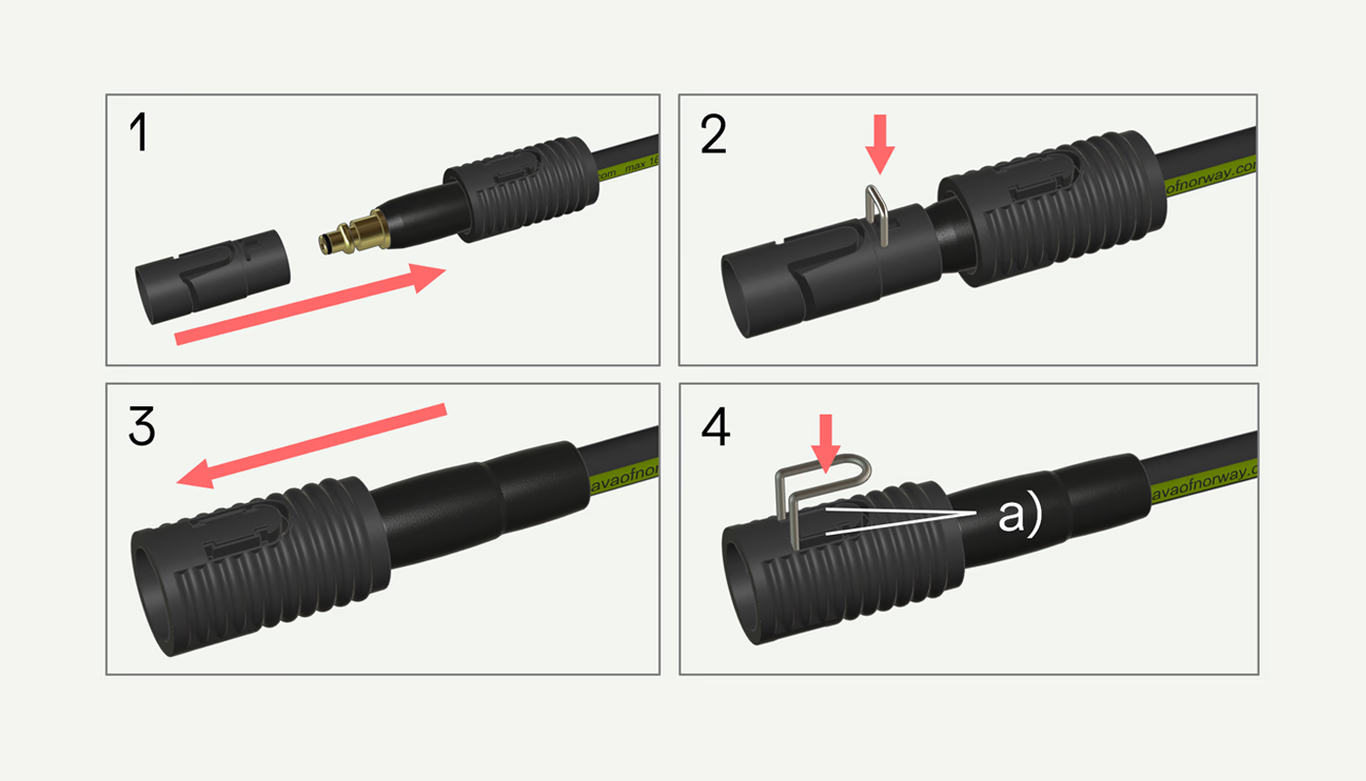
 03. Disassemble the female coupler
To be able to use the hose as a replacement hose, the female coupler must be disconnected.
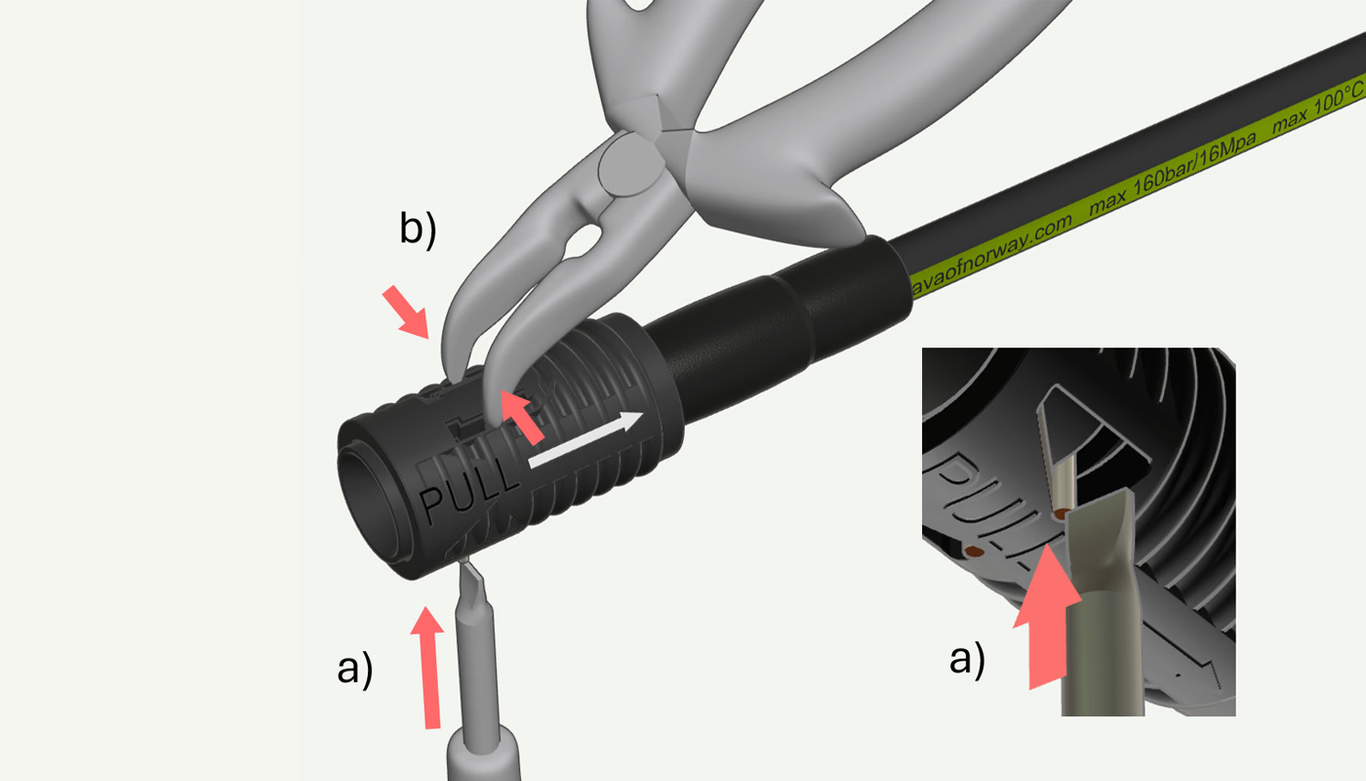
a) To disconnect the release-clip, use a flat screwdriver to press gently against the underside of the cotter pin.
b) To loosen the release-clip, use a pointed cutting pliers to gently press in two snap lock on the outer sleeve.
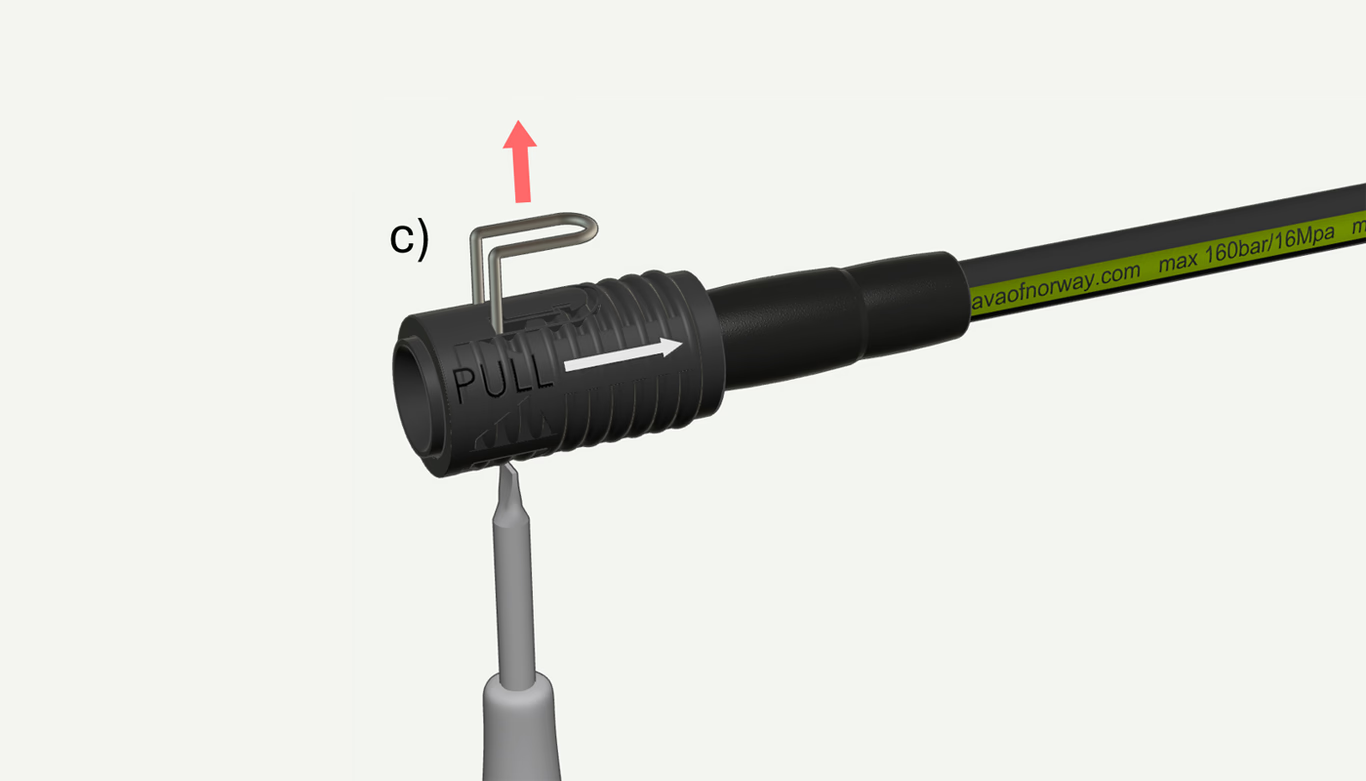
04. Pull out the release-clip
Push with the screwdriver and pull with hand/tool the release-clip c) out of the groove.
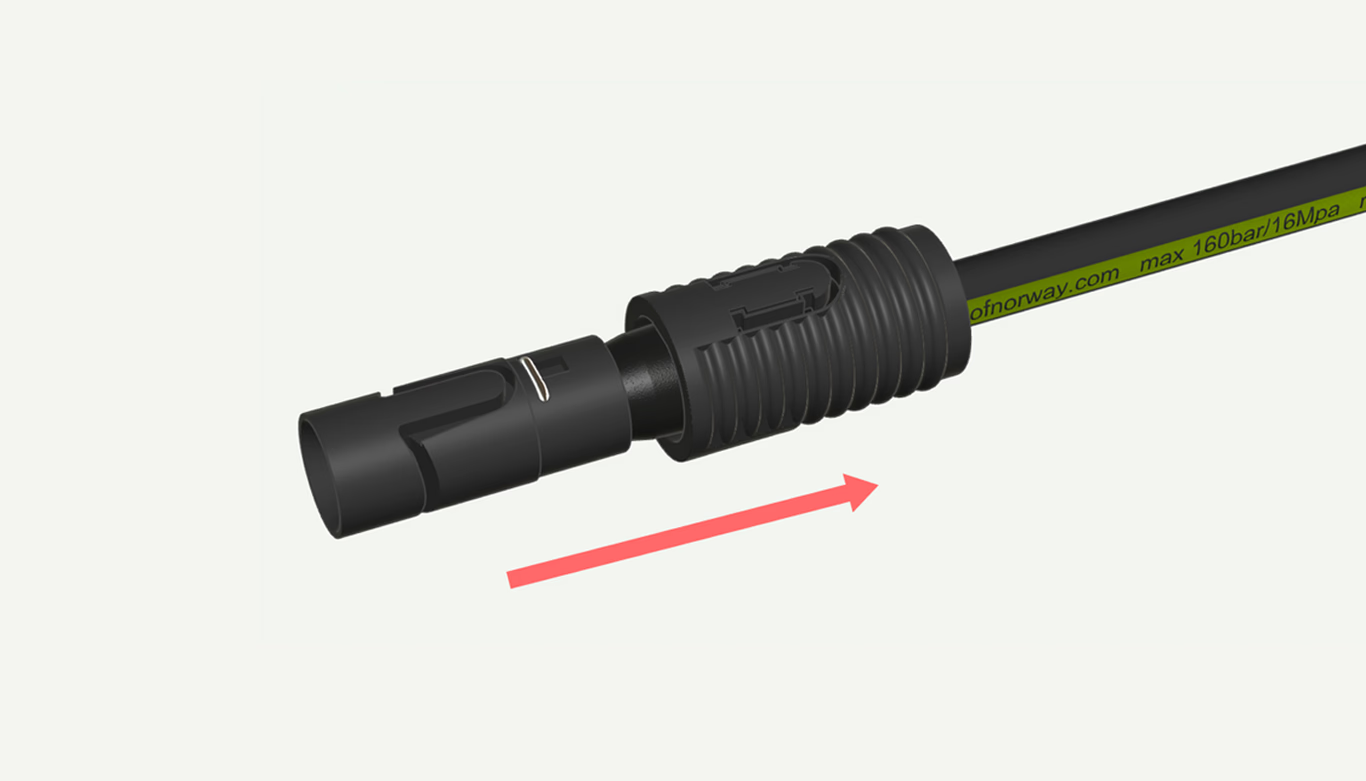
05. Pull away outer sleeve
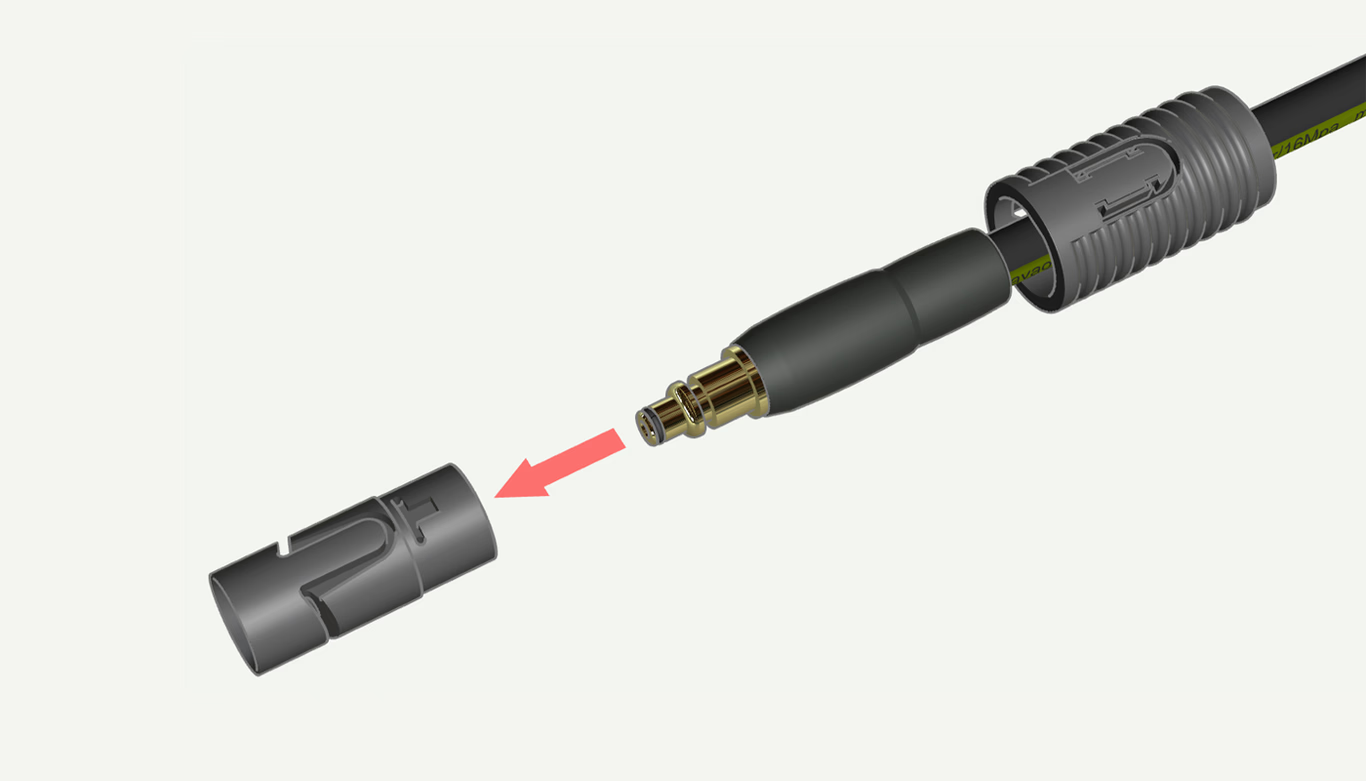
Pull the outer sleeve off the inner sleeve.
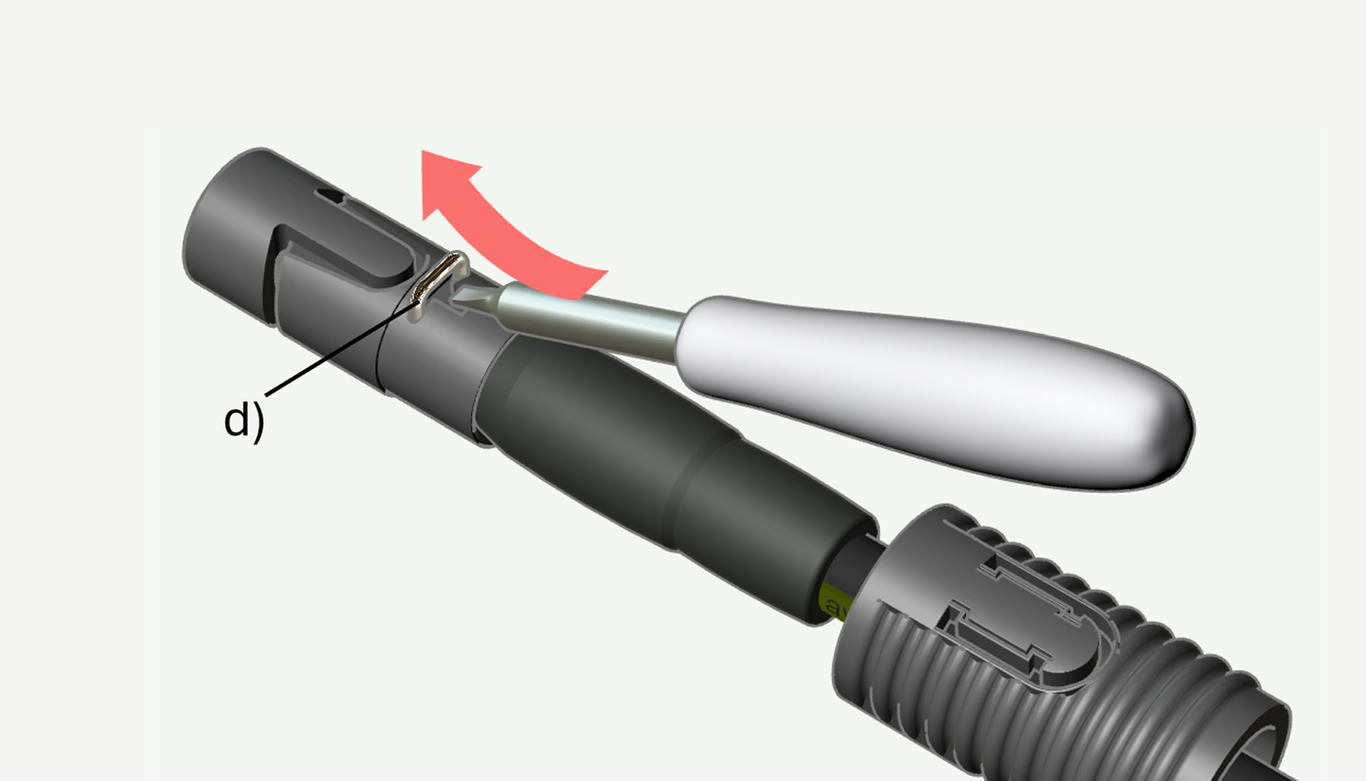
 05. Remove U-clip on the extension hose
Put the screwdriver into the groove and pull out the U-clip (d).
 06. Remove the inner sleeve from the quick connector
Remove the inner sleeve by hand.
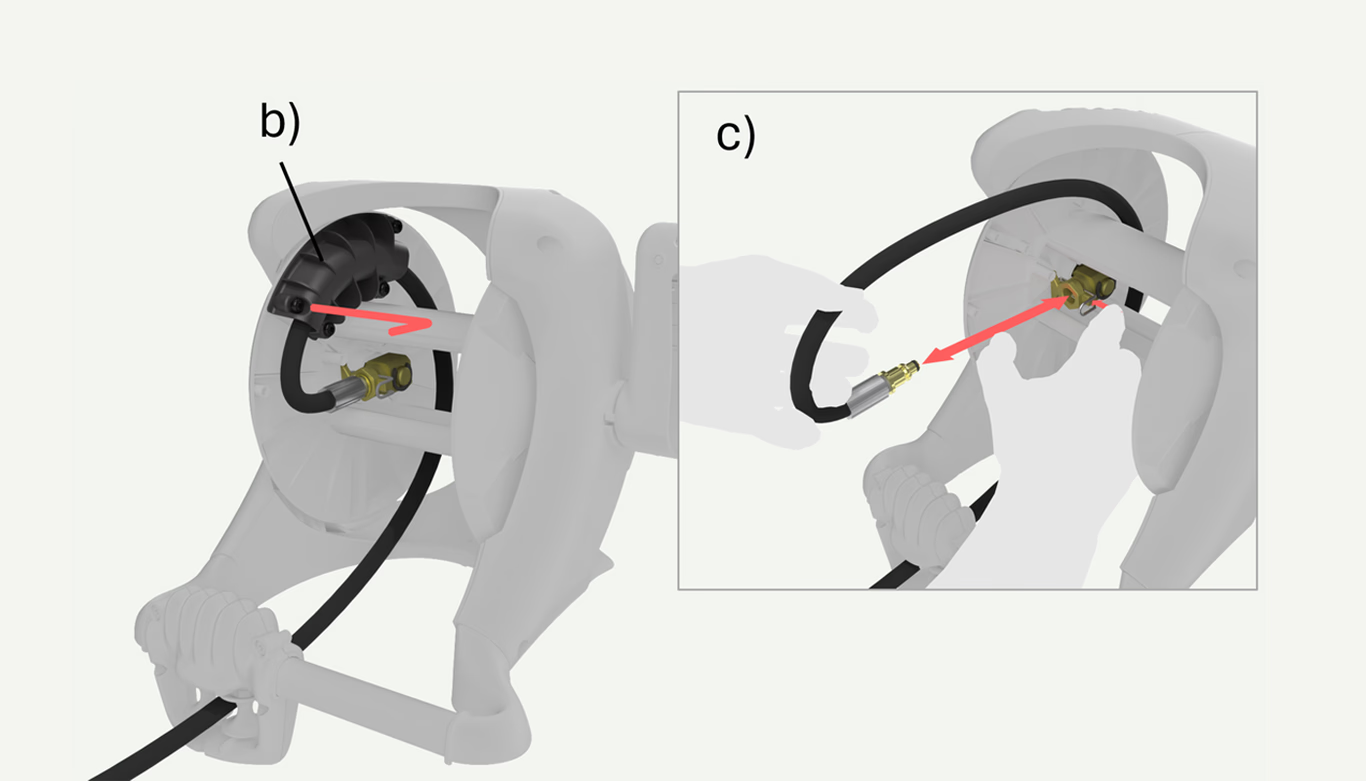
08. Install the main hose into a reel
a) Unwind the hose.
b) Remove hose cover.
c) Disconnect old hose and connect new hose.
Note: If you have a old Master that contains a square head quick connector as a part of the hose, you need to change UN 03. Follow step 4, 5, 6 in this article.
d) Reinstall hose cover.
The example below is taken from a Master reel. The principle is the same for Evolution, Smart, Easy, and Master models.
Reassemble the Female Coupler
When assembling the Female Coupler, perform steps 1 to 6 in the opposite order:
1.Put inner sleeve onto hose quick connector.
2.Secure inner sleeve with U-clip.
3.Pull outer sleeve over inner sleeve.
4.Put release clip all the way into grove. Push the clip below the two snap hooks (a).