
UN 03 Hose connector upgrade kit for Master inc U-pin and E-clip
Applicable for:
- Master: all models, both Master and Master 2.0
- Smart: all models
- Easy: all models
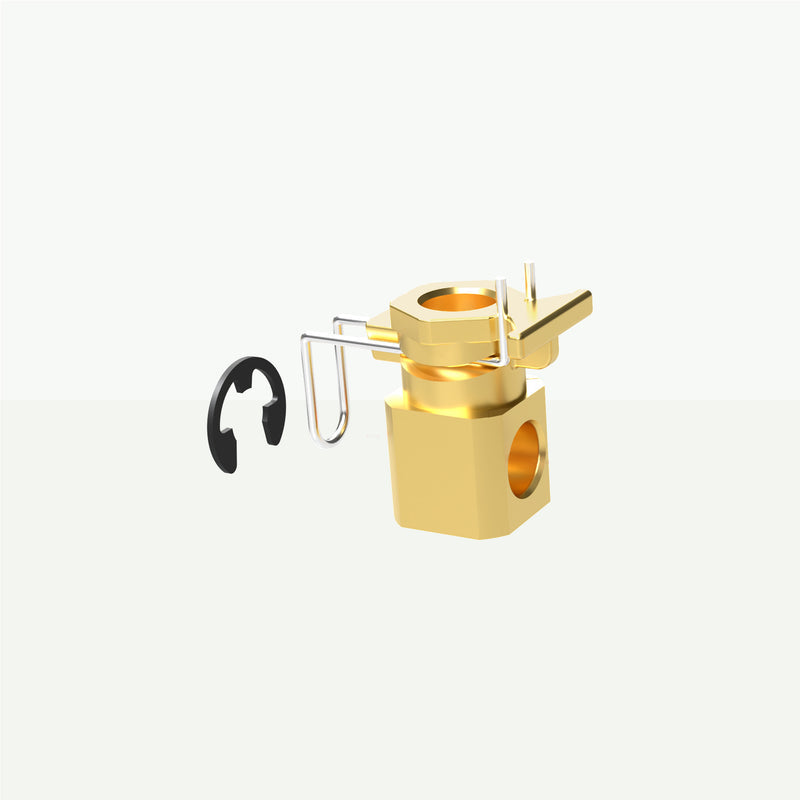
Kit Includes:
- U-clip
- E-clip
- Square Head connector
Typical causes for need:
- When you have an older Master (produced before 2020) that contains a square head quick connector as a part of the hose and
-
needs to change the hose.
- wish to have a simpler quick connector solution
-
needs to change the hose.
- Use of connectors with newer non-compatible hose models.
Tools:
- Flat screwdriver
- Wrench
Tools Needed for all AVA Pressure Washer Maintenance – AVA of Norway
Note:
If you have frost related damage and the male part of the swivel is broken, you need UN 02. Read more here.
Step-by-step guides:
- For older Master machines that contains a square head quick connector as a part of the hose:
- follow step 4-6 and 15in this guide
- If a new or damaged hose does not fit onto the reel, UN 03 will solve the issue:
-
follow step 4-6 and 15 in this guide
- Click here to see how to remove coupling so you can connect the gun.
-
follow step 4-6 and 15 in this guide
Failure Symptoms – Part Correlation:
- Incompability.
- Water leakage from hose connection.
Installation and Service Advice:
- Always prioritize safety first: Safety instructions – AVA of Norway
- Disconnect power and water before starting service.
- Ensure the hose is disconnected from the machine before beginning installation.
- Follow the step by step guide carefully.
- Use appropriate tools, such as a wrench or screwdriver, when installing components.
- Securely tighten the clips to ensure a tight connection and prevent leaks.
First start after change:
- Connect hose to the machine and water supply.
- Check for any leaks at the connection points.
- Run the machine briefly to confirm a secure connection and proper water flow.
- Inspect the upgraded connection for stability.
Troubleshooting:
-
Water leaking from connection:
- Ensure the clips and upgrade components are properly secured.
- Check for damage to the O-rings and replace if necessary.
-
Inability to connect hose:
- Verify that the hose coupling is correctly aligned with the machine's connector.
- Inspect for debris or damage at the coupling points.
-
Reduced water flow:
- Confirm that all hose connections are properly tightened.
- Inspect for blockages or debris inside the hose or machine.
Warranty and Self-Upgrade – The AVA Way
At AVA, we support maintenance and upgrades to extend the life of your equipment. You are free to service and upgrade parts on your AVA pressure washer without voiding your warranty.
Price includes VAT
UN 03 Hose connector upgrade kit for Master inc U-pin and E-clip
Applicable for:
- Master: all models, both Master and Master 2.0
- Smart: all models
- Easy: all models
Kit Includes:
- U-clip
- E-clip
- Square Head connector
Typical causes for need:
- When you have an older Master (produced before 2020) that contains a square head quick connector as a part of the hose and
-
needs to change the hose.
- wish to have a simpler quick connector solution
-
needs to change the hose.
- Use of connectors with newer non-compatible hose models.
Tools:
- Flat screwdriver
- Wrench
Tools Needed for all AVA Pressure Washer Maintenance – AVA of Norway
Note:
If you have frost related damage and the male part of the swivel is broken, you need UN 02. Read more here.
Step-by-step guides:
- For older Master machines that contains a square head quick connector as a part of the hose:
- follow step 4-6 and 15in this guide
- If a new or damaged hose does not fit onto the reel, UN 03 will solve the issue:
-
follow step 4-6 and 15 in this guide
- Click here to see how to remove coupling so you can connect the gun.
-
follow step 4-6 and 15 in this guide
Failure Symptoms – Part Correlation:
- Incompability.
- Water leakage from hose connection.
Installation and Service Advice:
- Always prioritize safety first: Safety instructions – AVA of Norway
- Disconnect power and water before starting service.
- Ensure the hose is disconnected from the machine before beginning installation.
- Follow the step by step guide carefully.
- Use appropriate tools, such as a wrench or screwdriver, when installing components.
- Securely tighten the clips to ensure a tight connection and prevent leaks.
First start after change:
- Connect hose to the machine and water supply.
- Check for any leaks at the connection points.
- Run the machine briefly to confirm a secure connection and proper water flow.
- Inspect the upgraded connection for stability.
Troubleshooting:
-
Water leaking from connection:
- Ensure the clips and upgrade components are properly secured.
- Check for damage to the O-rings and replace if necessary.
-
Inability to connect hose:
- Verify that the hose coupling is correctly aligned with the machine's connector.
- Inspect for debris or damage at the coupling points.
-
Reduced water flow:
- Confirm that all hose connections are properly tightened.
- Inspect for blockages or debris inside the hose or machine.
Warranty and Self-Upgrade – The AVA Way
At AVA, we support maintenance and upgrades to extend the life of your equipment. You are free to service and upgrade parts on your AVA pressure washer without voiding your warranty.


